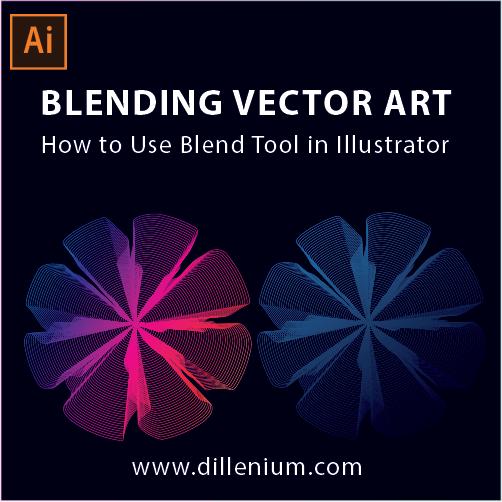
Blending vector art in Adobe illustrator creates magical objects. If you want to know how to use blend tool to create 3d flower then this video tutorial will help you out to create 3d looking blending art.
Blend tool is the most powerful tool in adobe illustrator and if you know how to use the blend tool then you can create different shapes, object and abstract art based on your creativity.
Here in this video tutorial, I tried to use the blend tool and create blending vector art based on abstract 3d flower concept. In graphic design, there is no limit to define and shape the creativity. Every person has unique creativity and blend tool help you to transform the concept as per your visuals.
Blending Vector Art – Video Tutorial
Tool used: Adobe Illustrator CS6
Watch Duration: 4:53
Level: Basic
Download Project File: Click Here!

Blending Vector Art – Step by Step
Here are the Simple Steps to Create blending vector art or how to use blend tool in illustrator:
- Using Shape tool, create a circle only with stroke color. Fill color should be off.
- Next, create another circle and align it to the middle as a parallel circle. You can use Align tool for adjustment.
- Click ‘W’ from the keyboard or in tool section find ‘Blend tool’ and click on it by watching steps in the video.
- You can click on one anchor point of the inner circle and another anchor point of the bigger circle.
- Next, double-click on blend tool to open setting window and click on ‘specified steps’ from the menu and add 48 steps and press ok.
- Next, intact the Warp tool or press Shift R from the keyboard.
- Make adjustment in setting window:
- Width: 100%, Height: 100%, Angle: 45, Intensity: 100% (recommended).
- In next round, select middle anchor points of the circle and run the mouse zigzag to create rotating or blending effect.
- Apply this step 9 to all 6 anchor points to create this blending vector art.
Thanks for watching!!!
Illustrator Tutorials Might be Helpful for you:
- How to Create Grunge Brush Illustrator
- Adobe Illustrator tutorials
- Create Chalkboard Background in Adobe Illustrator
- How to Create Neon Glowing Light Effect
- iPhone x Vector Template – Mockup
- How to Create Glitter Effect Illustrator
- How to Create Rope Brush Illustrator
- Golden Ratio Logo # 2 – Floral Design
- Create Smoke Vector Effects in Illustrator
Leave A Comment